Papakolea's olivine sand glistens in the early morning light.
Planning a visit to Hawaii’s famous green sand beach? Enjoy hiking and/or avoiding crowds? Do you happen to be on the Big Island with literally nothing to do? Here’s everything you need to know about how to get to Papakolea Beach and what to expect when you get there.
Before you go, here are some things you should know about Papakolea Beach:
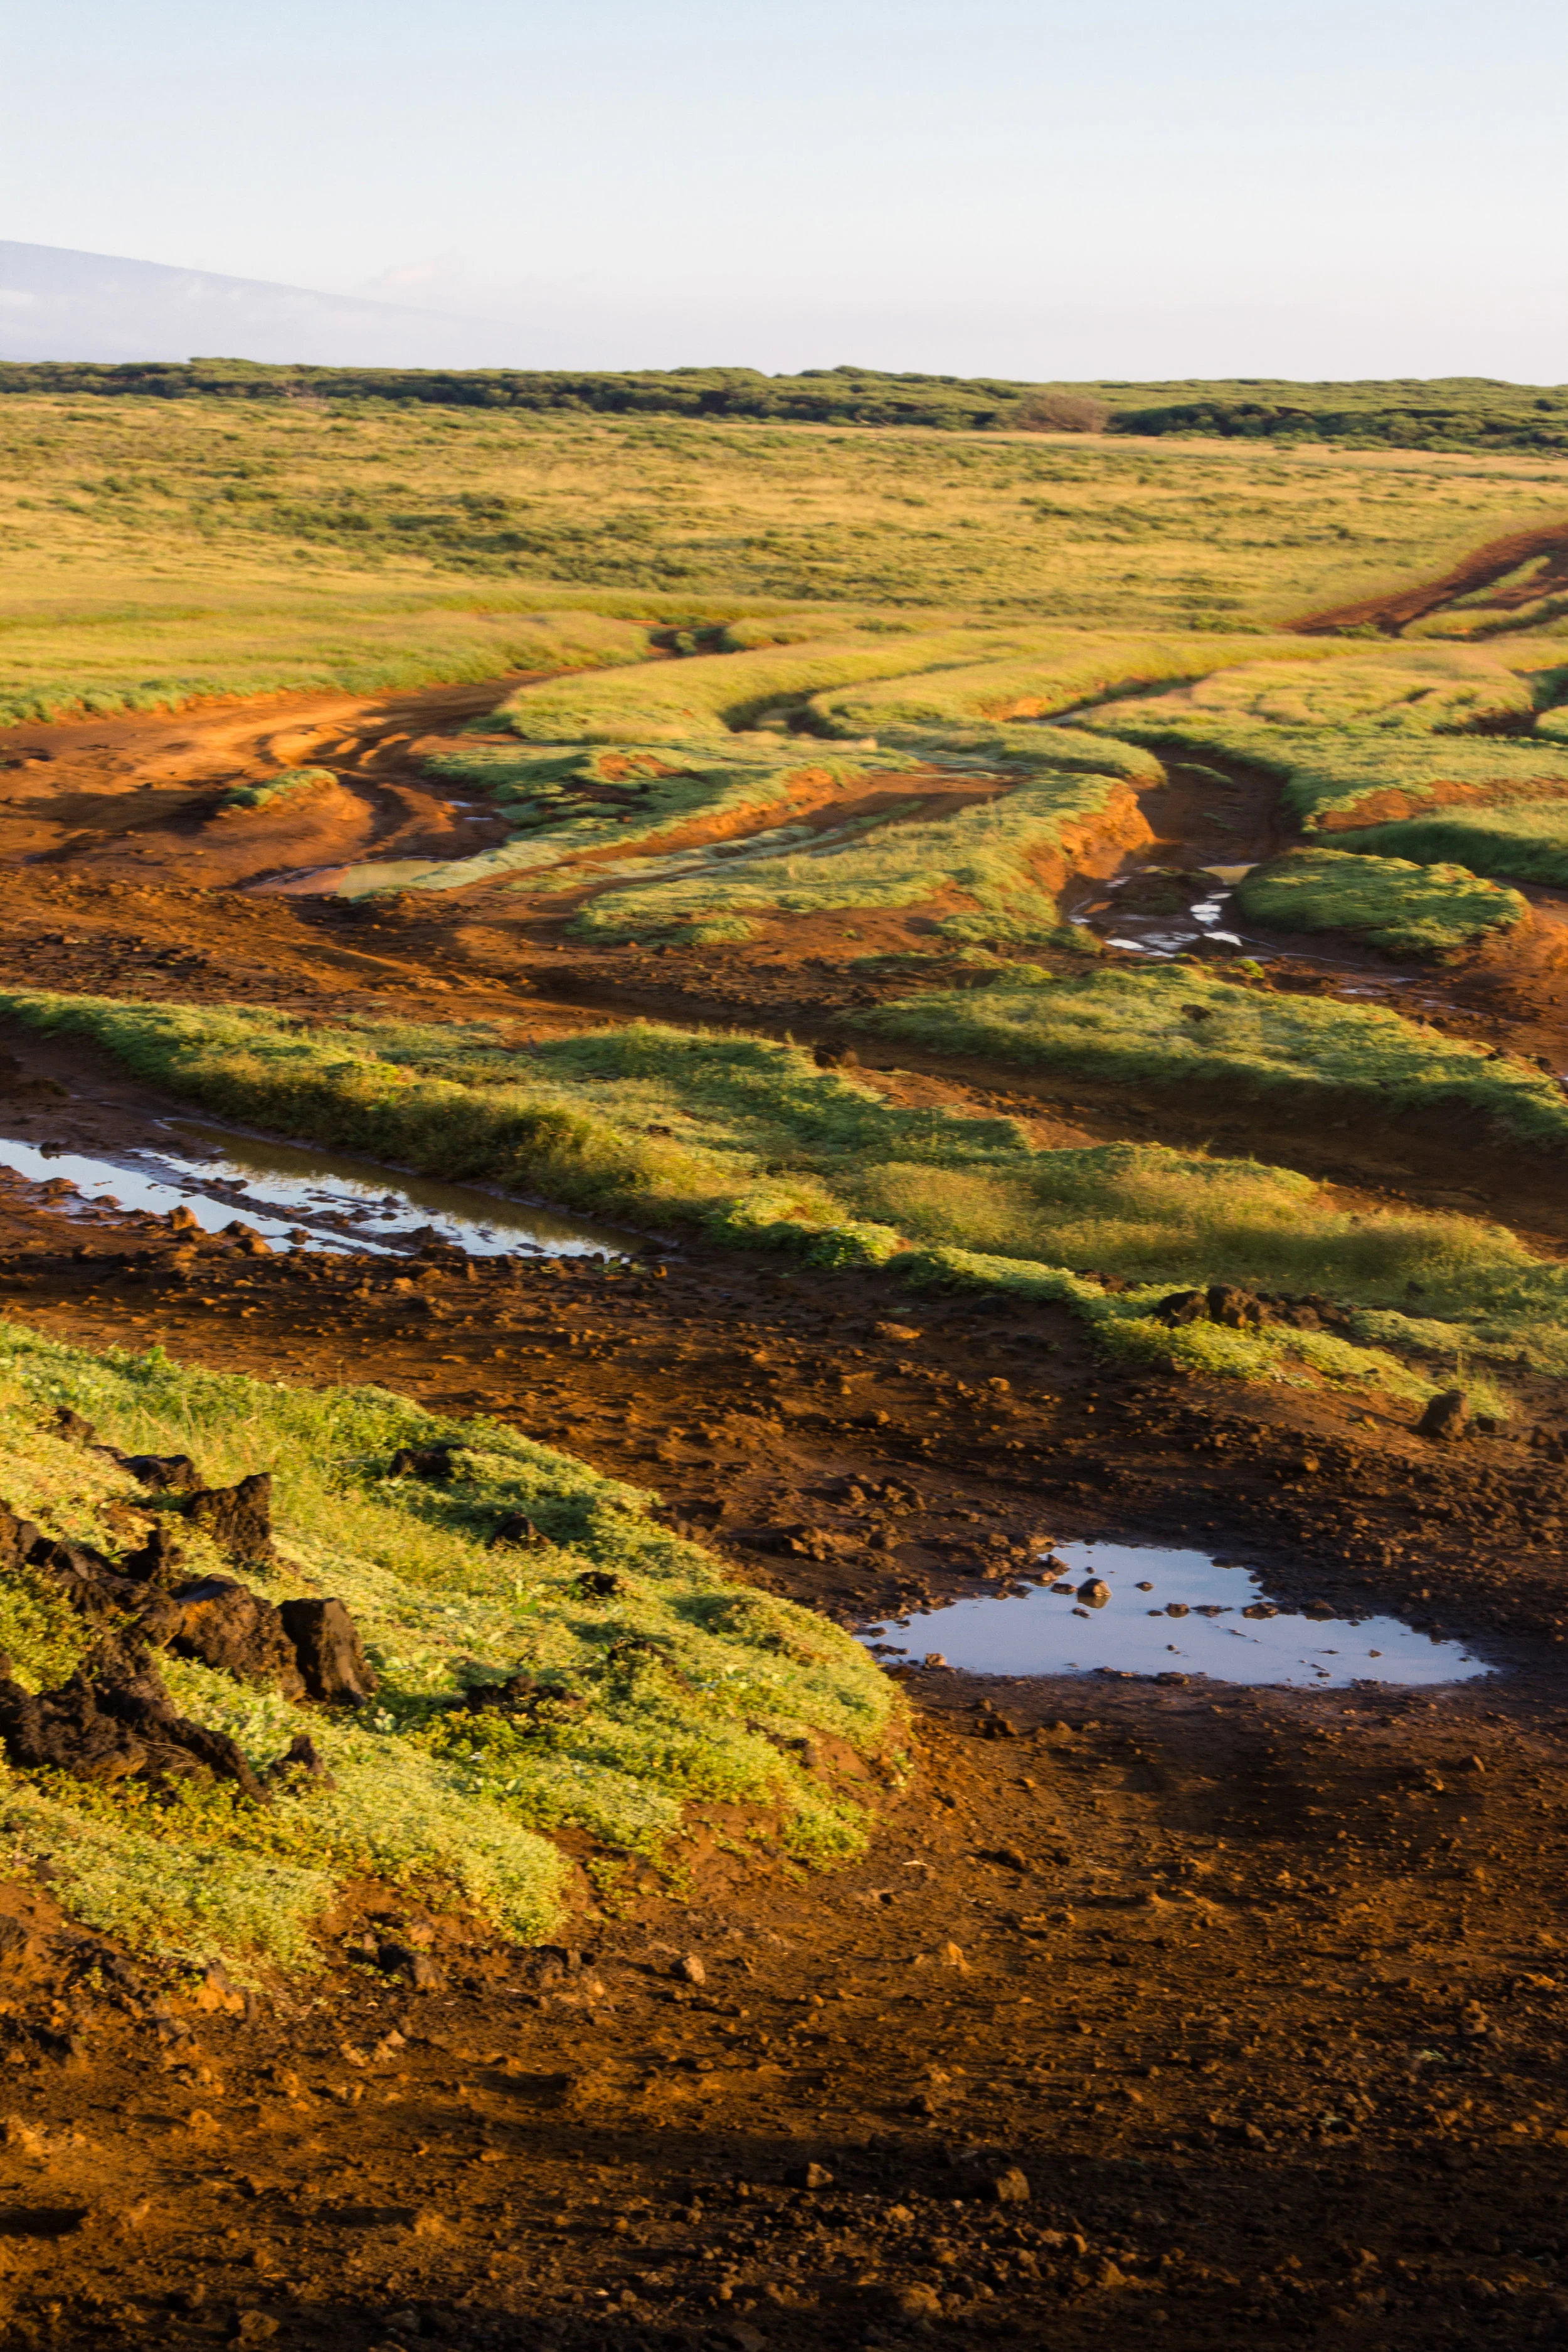
The trail to Papakolea.
Firstly, the green-sand makes Papakolea Beach highly distinctive— it’s one of only four green sand beaches in the world! This inevitably leads to the question: can I take the sand with me? The answer, unfortunately, is no. In order to conserve the rare and beautiful beach, do not remove any of the sand (this pretty much goes for everything in Hawaii, you can look, you can touch, you can maybe even taste?, but you can’t take). If conservation isn’t enough to deter you from stealing the sand, beware Pele’s Curse! The native Hawaiians hold the belief that anyone who takes anything natively Hawaiian (rocks, sand, etc.) will be cursed by the fire-god Pele and have terrible luck. Personally, I wouldn’t want to incur any bad luck right before a 2000+ mile flight home.
Secondly, the beach formed from a former volcanic cone, known as a tuff ring, some 49,000 or so years ago. The beach gets its distinctive color from the mineral olivine, which is relatively common below the surface of the earth.
Finally, to get to the beach you have to hike 3 miles, or 6 miles round trip. Fortunately, the path to the beach is pretty much flat and straightforward, so the three miles really only feel like a two-miles hike through more mountainous terrain. Unfortunately, there is absolutely zero tree cover, so it will get hot! Bring sunscreen and a hat! Likewise, because the beach is relatively remote, there are no facilities of any kind or places to refill water near the beach, so plan ahead accordingly.
How to get there:
Between Kona and Hilo lies Hwy 11. Get on that and head south. If you’re coming from Hilo, head Southwest. If you’re coming from Kona, Southeast. Between mile markers 69 and 70 is South Point Road. That’s the goal. Once you turn onto South Point road you’ll follow that all the way down to near the Southernmost Point/Jumping off point.
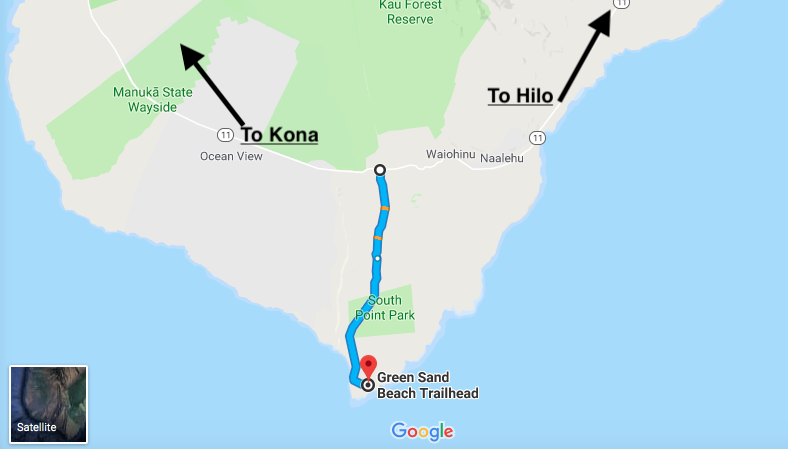
An overview of the driving directions to the parking lot.
Just prior to the Southernmost Point, South Point Road forks. If you go right, it takes you to the Southernmost Point. If you go left, you get to the parking lot for the Green Sand Beach. If you’re like me and get to the parking lot before any of the other hikers early in the morning, you might notice that the parking lot isn’t very clearly marked and/or might be next to shady looking people up to shady looking things. If you drive through the parking lot you get on a loop road that takes you around some bushes back to the parking lot. I parked near the bushes. If you get lost/confused, I recommend using the satellite view on google maps, it helps tremendously.
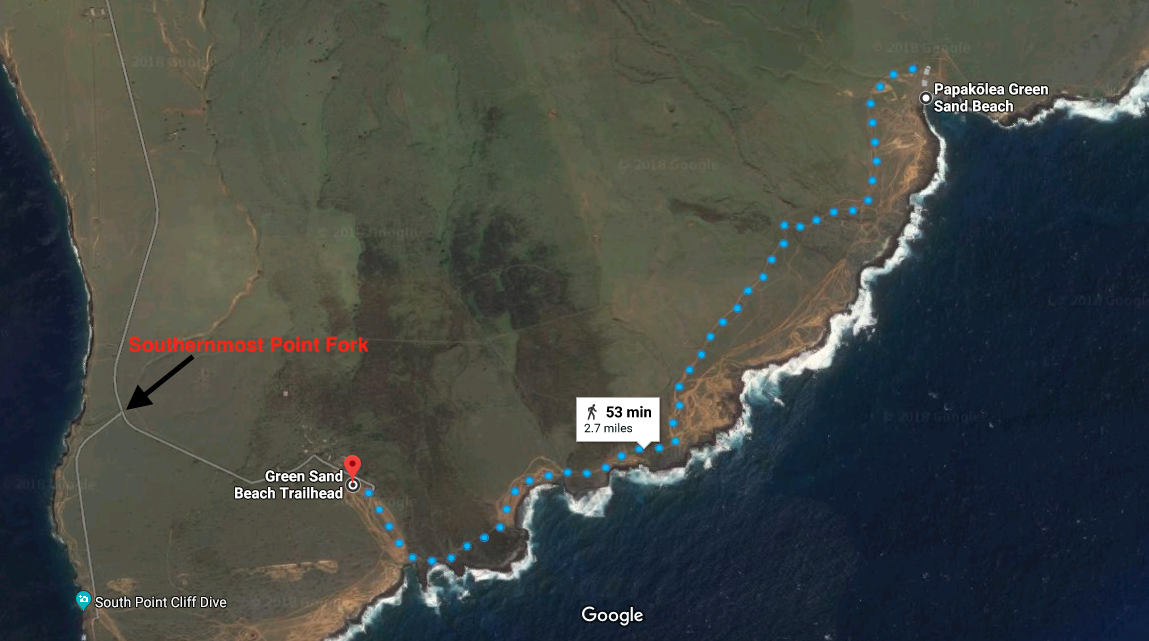
A closer look at the fork in the road, where to park and the hike itself.
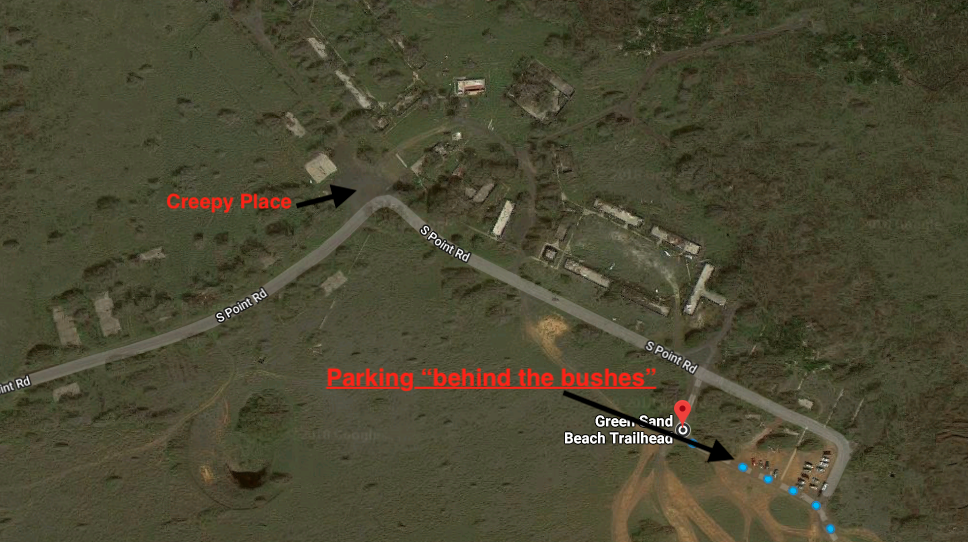
Details on where to park. Avoid the "creepy place".
From the parking lot walk towards the water. Just before you find yourself ankle deep in the pristine Hawaiian waves, turn left. You'll see the start of the trail. The trail itself is unmarked. Follow the coast east until you reach the green sand, some 3 or so miles down the way. I followed the coast, which I think is the slightly longer but slightly more scenic route. However, to save time, following any of the more inland tire tracks should also get your there.
Best Time to Go:
Hands down the best time to visit Papakolea is the morning. Why? For starters, it's not as hot. Due to the complete lack of tree cover along the route and Hawaii's proximity to the equator, attempting this hike in the middle of the day requires both large volumes of water and copious amounts of sunscreen. Also, for anyone hoping to photograph the beach, going in the middle of the day will result in extremely bland light— sunrise is better. Thus, I'd recommend starting the hike about an hour or so before sunrise. Finally, if you're hoping to have some privacy and/or don't like other tourists, there will be fewer/none if you have to get up early to start the hike.
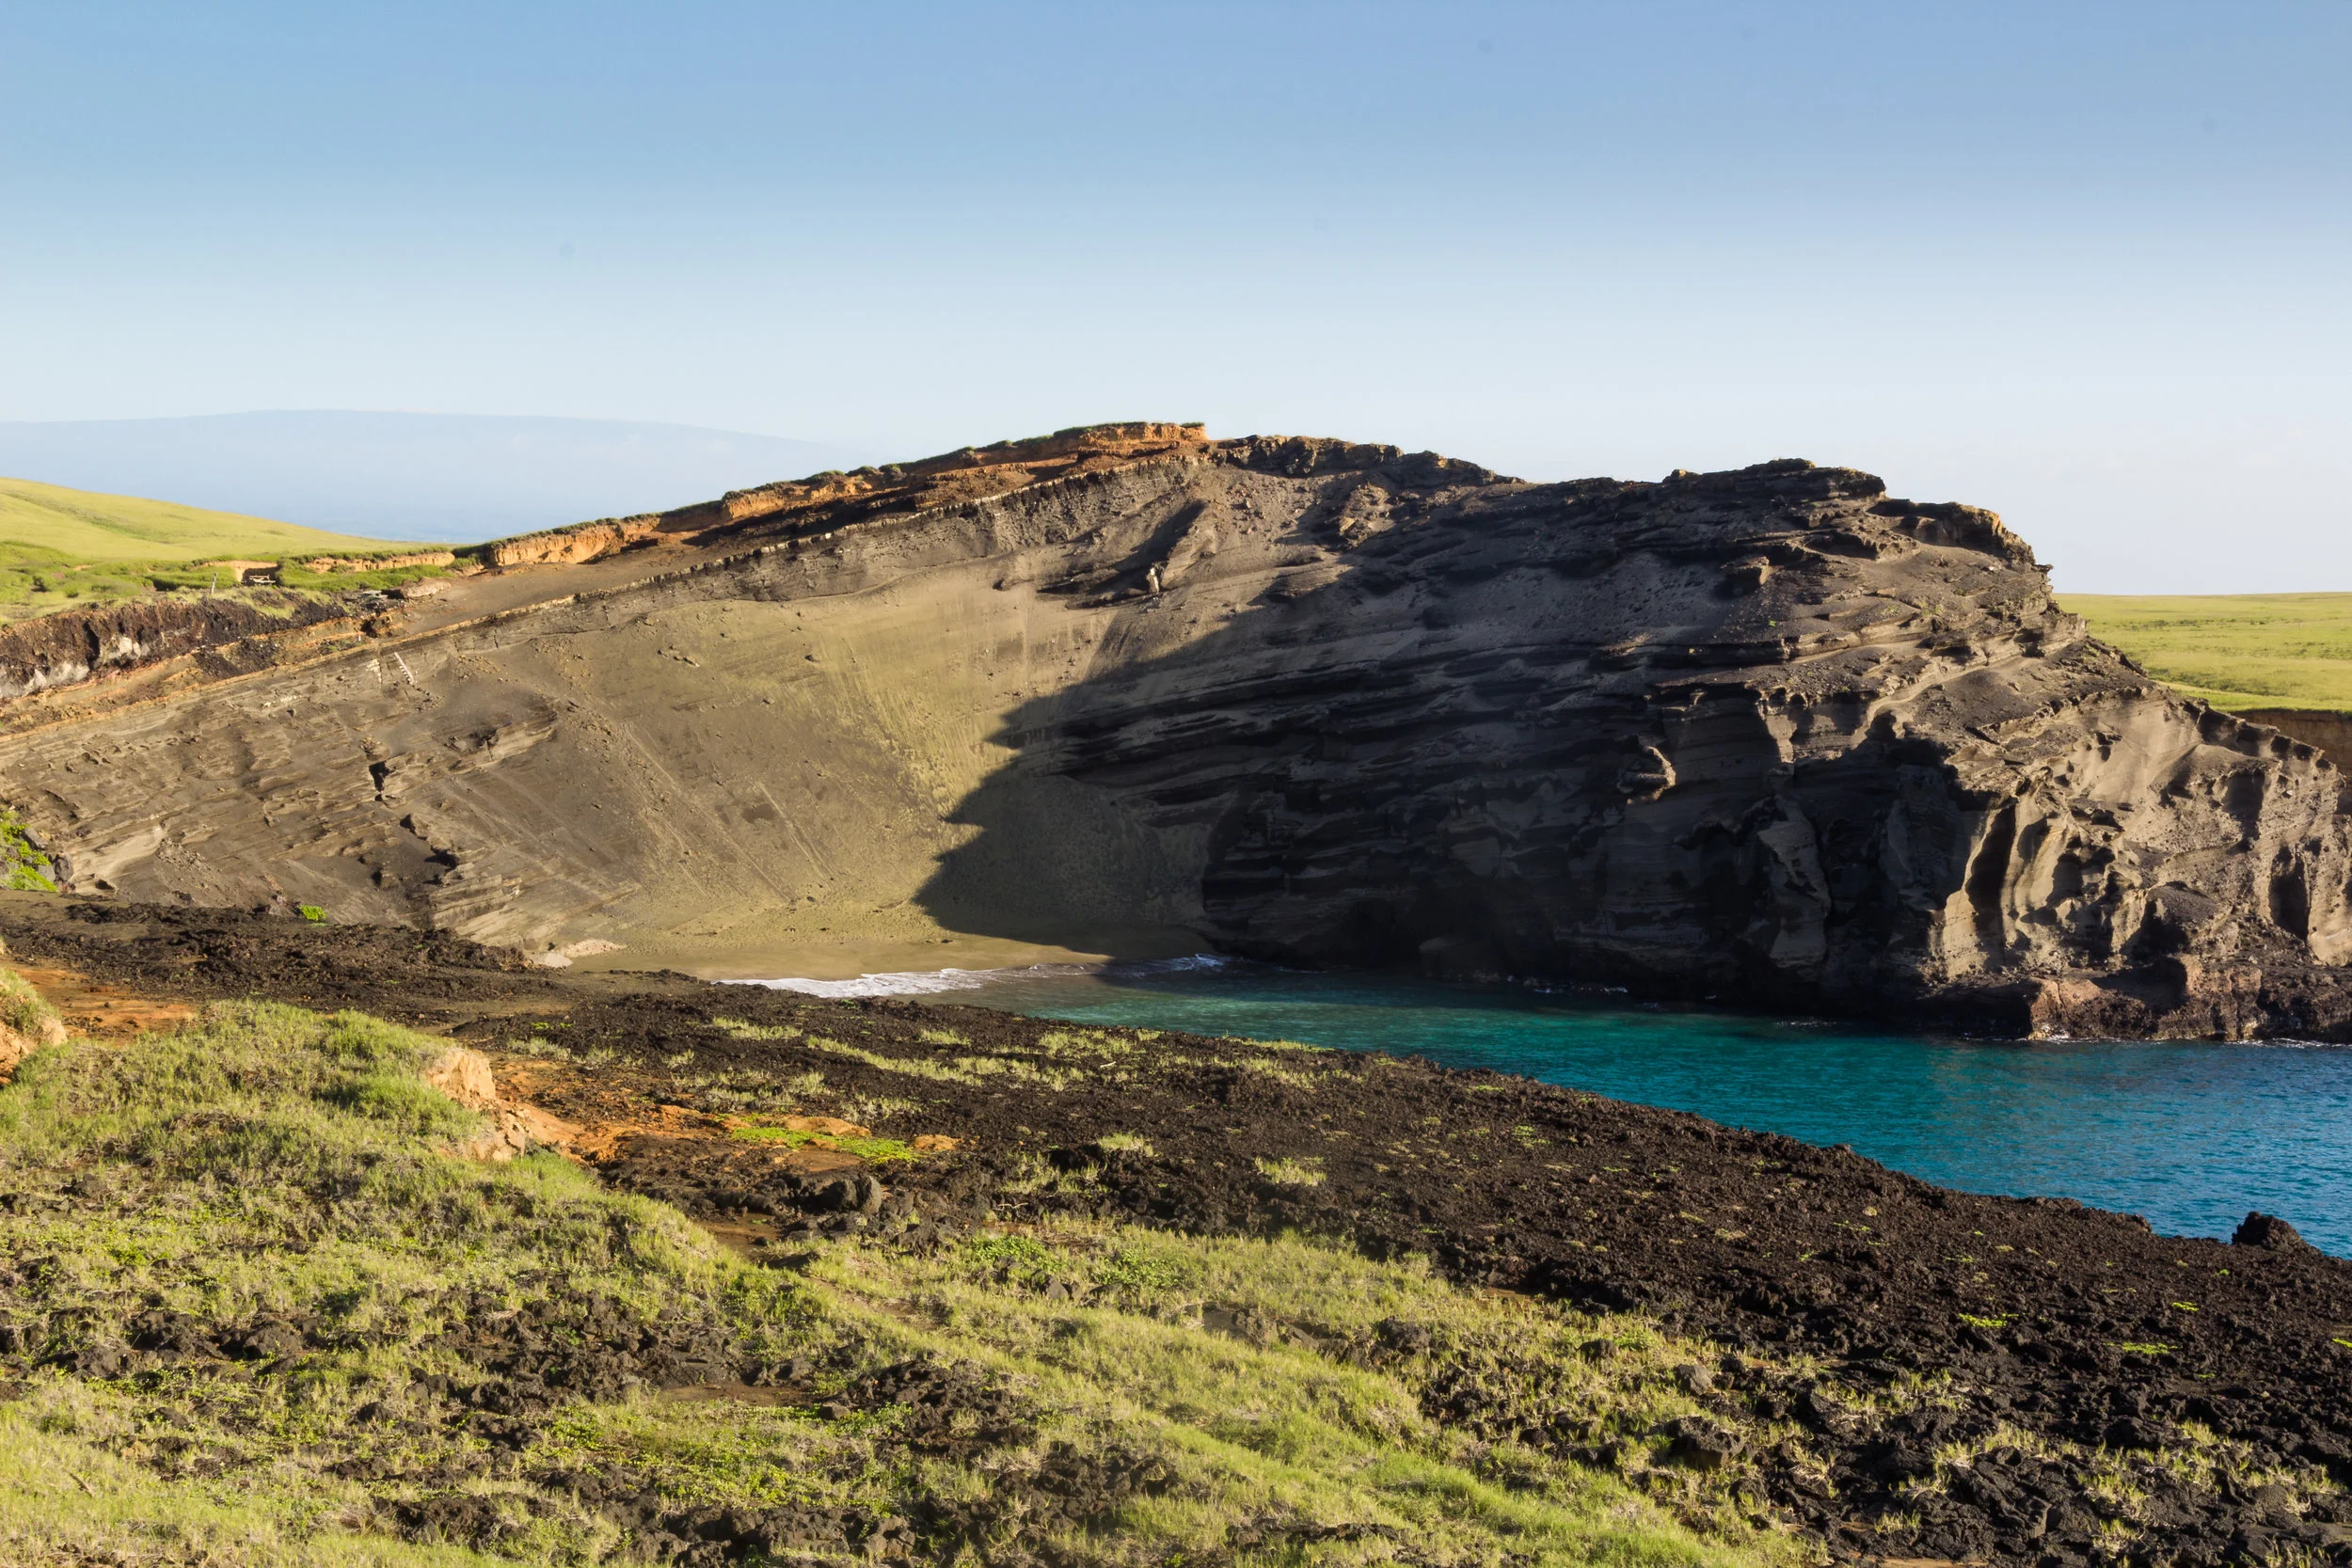
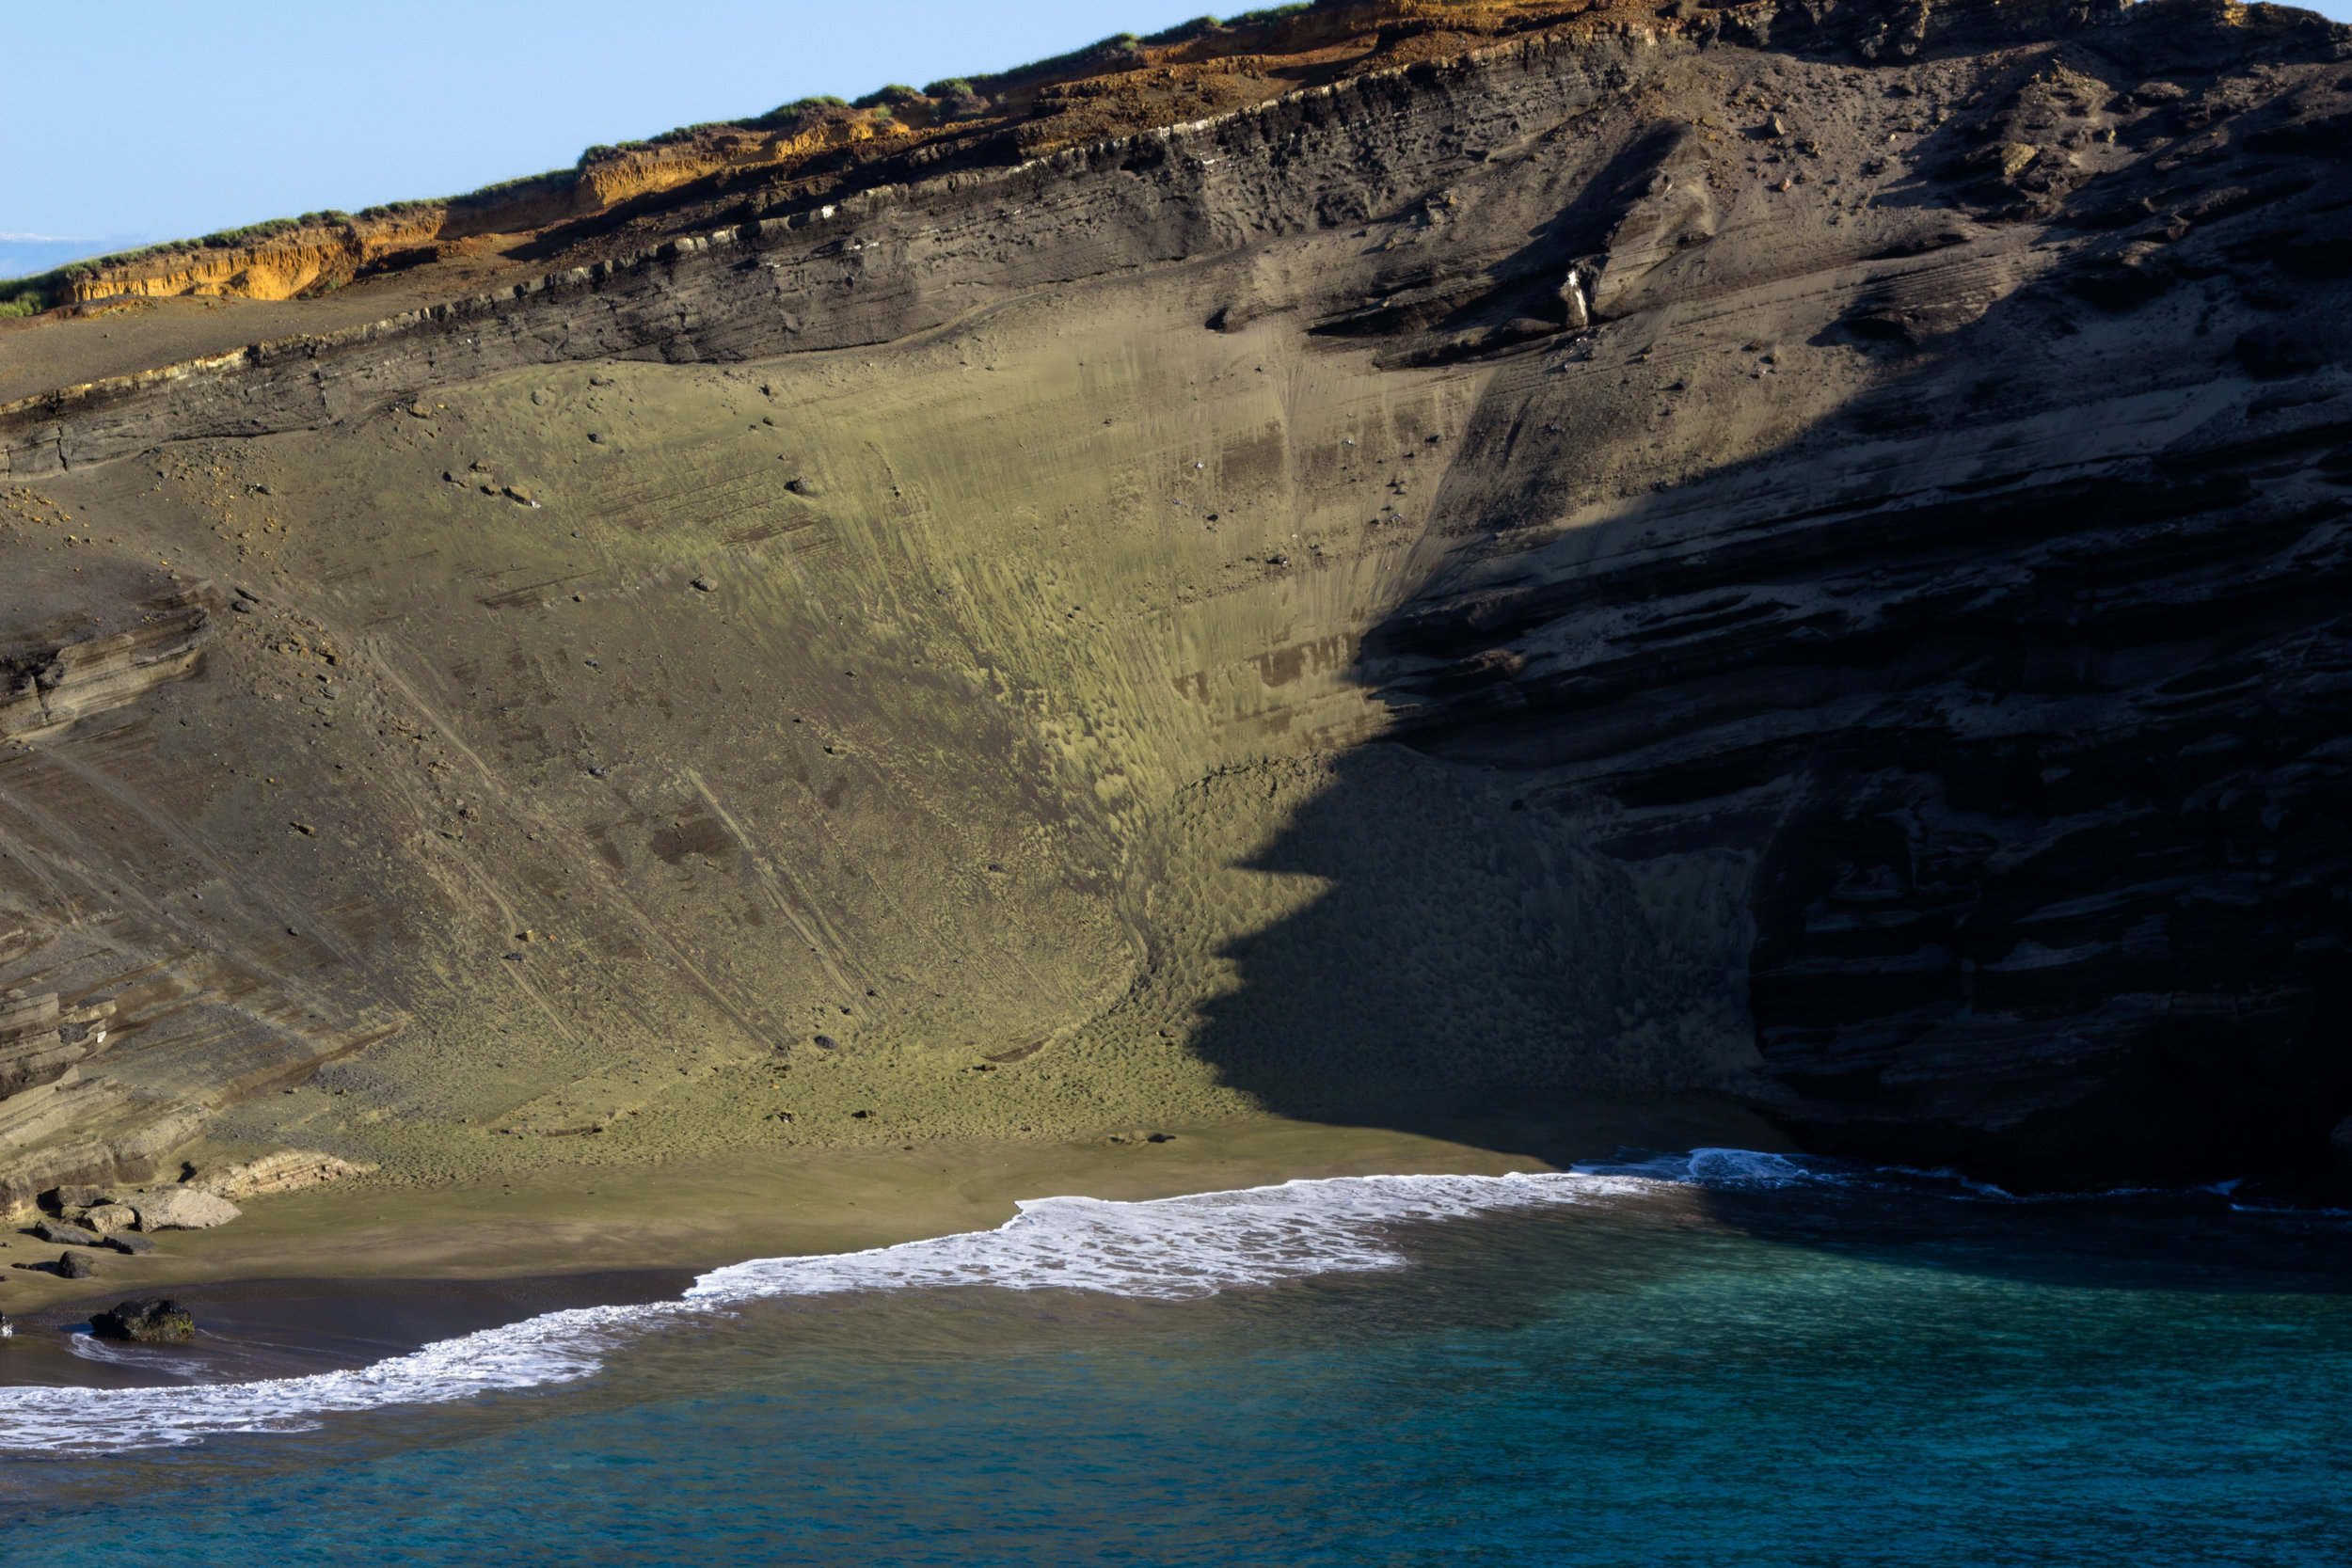
The green sand beach early in the morning sun.
What to Expect:
The beach itself is both remote and undeveloped— a little taste of Hawaii before all of the colonization and tourism. Thus, there are no toilets, lifeguards, or restrooms, nor anywhere to refill water bottles.
You should be comfortable hiking five or six miles across relatively flat ground, with little to/no contact with other people. As is to be expected, cell reception is minimal at best. Bring comfortable hiking shoes; a hiking sandal like Chacos or Tevas is ideal (you're going to the beach after all).
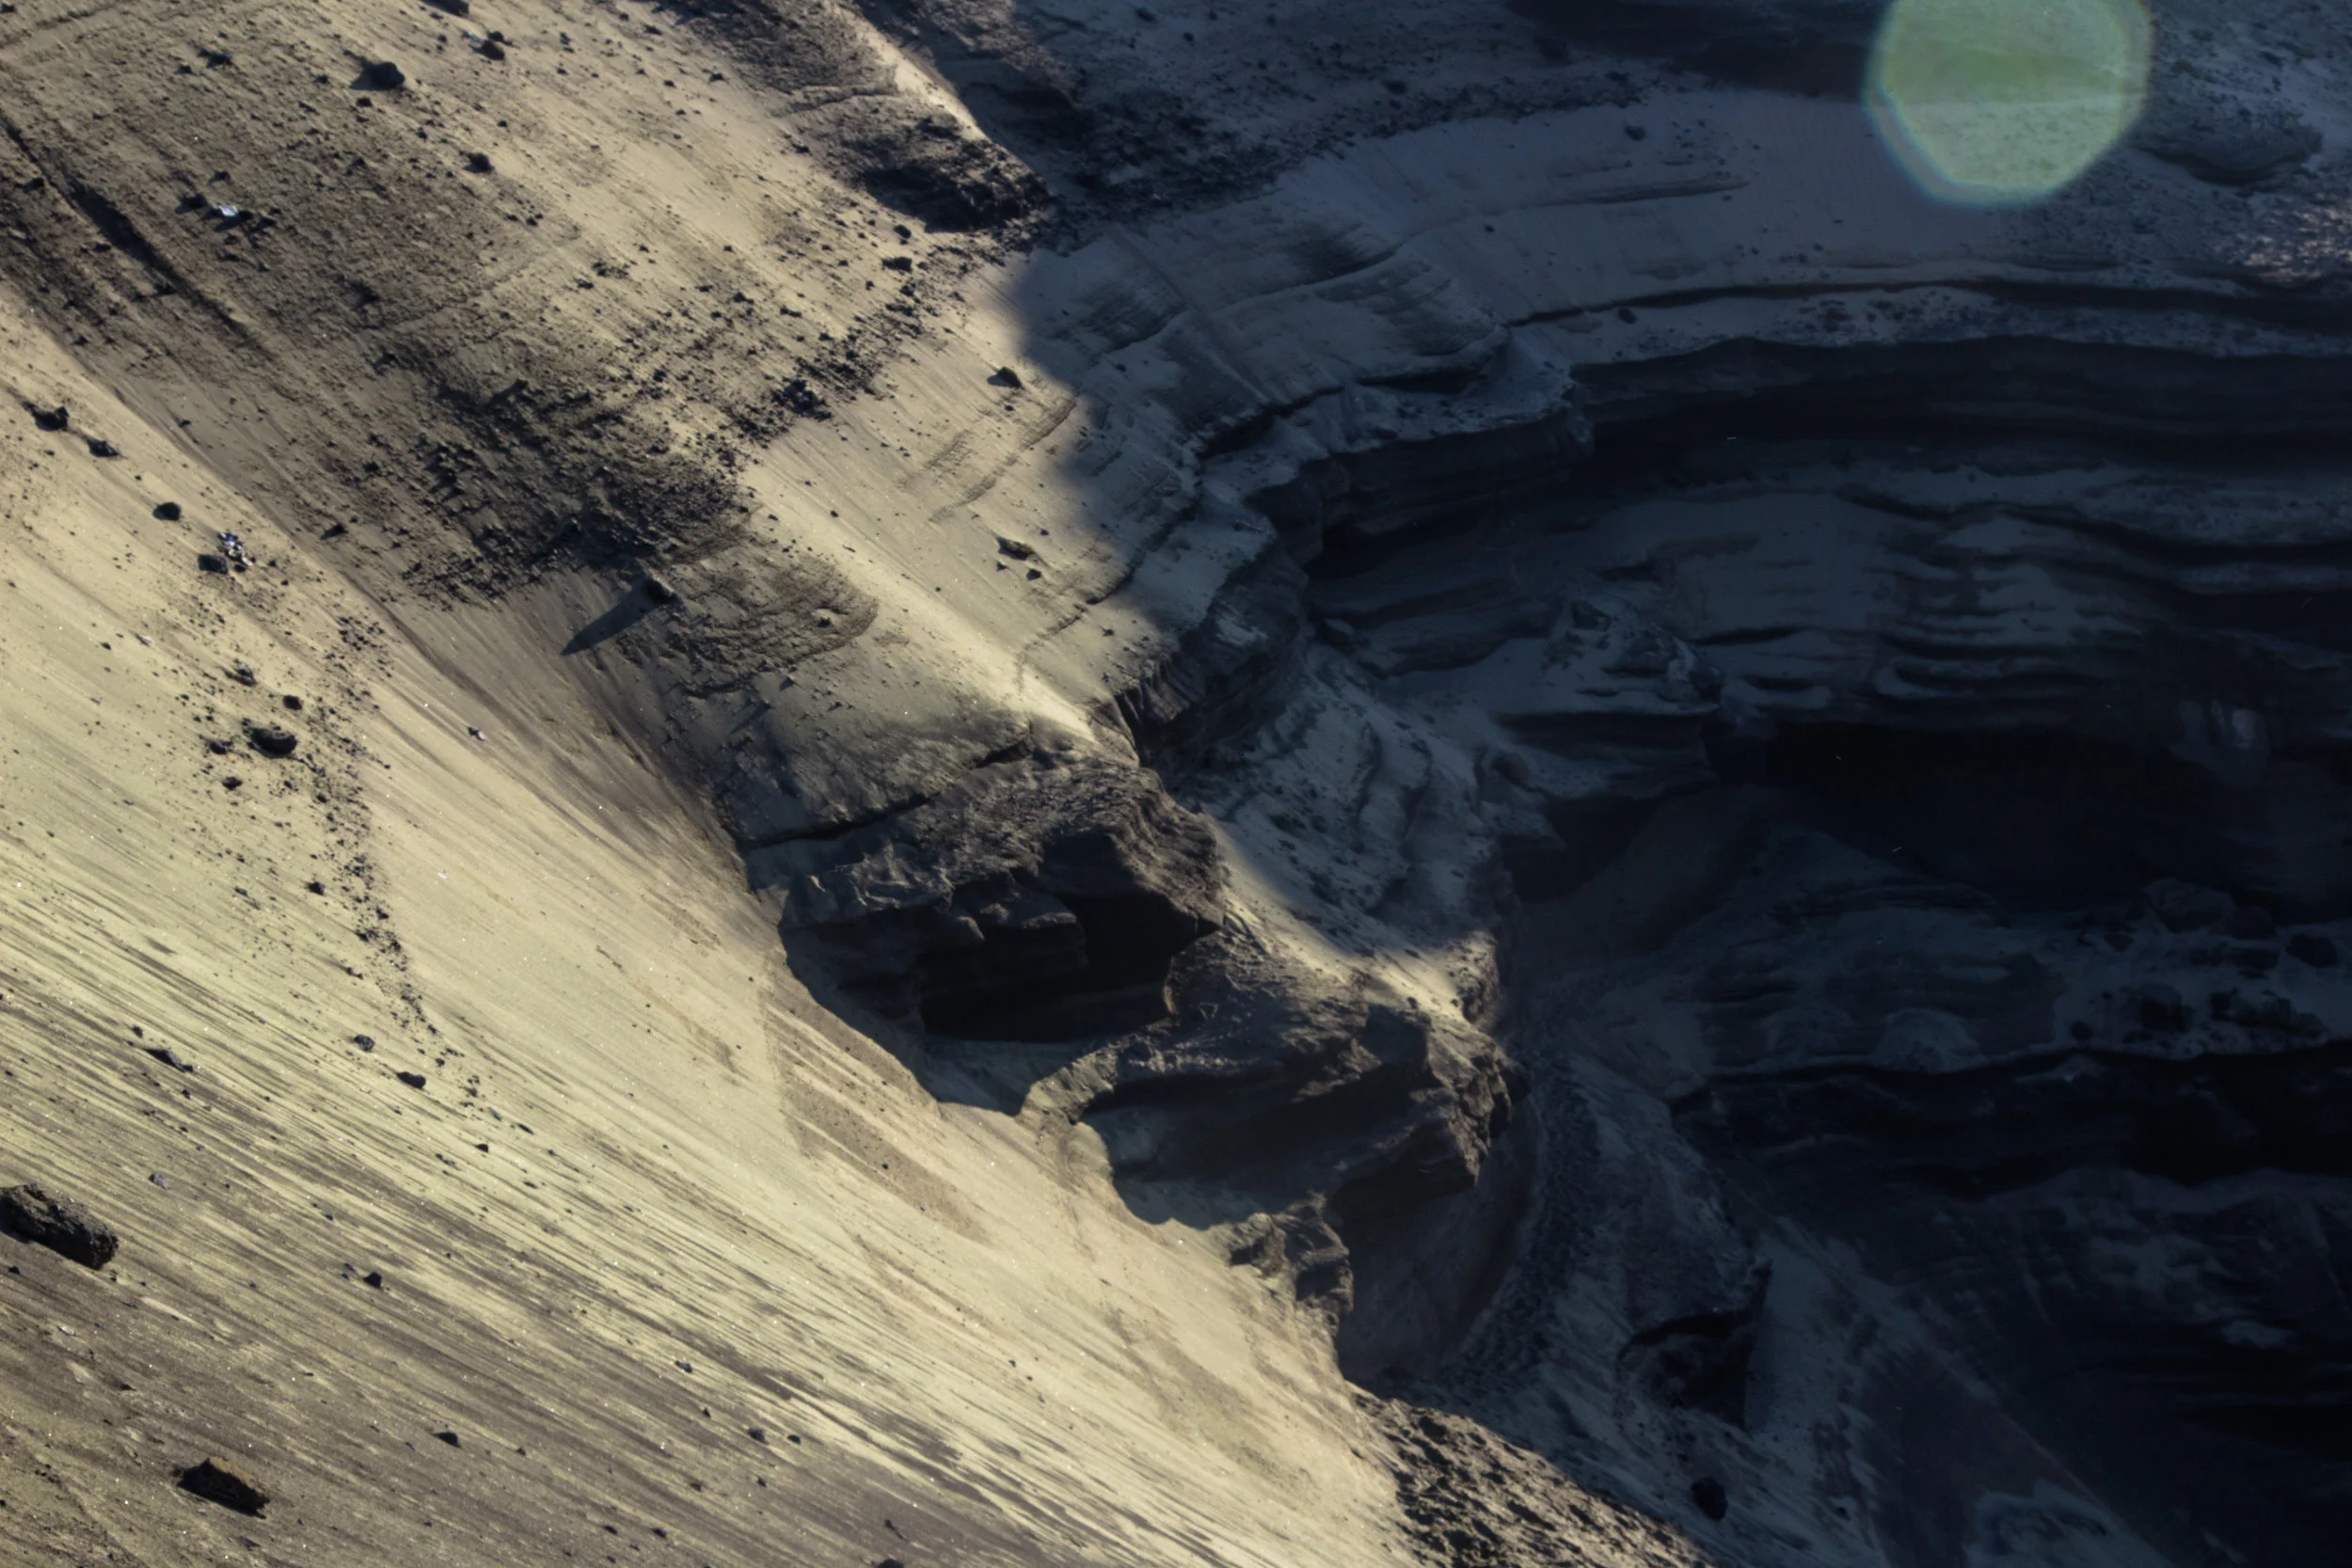
The steep, green slopes.
Once you get to the beach, you have to descend the somewhat steep walls surrounding the beach. Fortunately, there is a staircase to help you down the steepest part. From there you can weave your way back and forth down the sides of volcanic cone— it's not as steep as it looks. If you choose to get in the water, do so at your own risk: when I was there it was pretty choppy and had a bit of a current. Finally, expect lots and lots of glittering green sand. Run your hands and toes through it; the sand is incredible!
What to Pack:
- Essentials
- Lots of water (1-2 L at least)
- An good insulated water bottle like Hydroflask works fantastic to fight the heat.
- Sunscreen
- I prefer Neutrogena for its consistency and smaller size relative to spray cans.
- Solid/Sturdy Shoes
- Can't recommend Chacos enough (but break them in before taking them on a long hike!).
- A swimsuit (and small towel)
- Alternatively, Baggies work well since they chafe like a swimsuit. (The shorter the inseam the better).
- A solid hat offering neck coverage
- A Booney-style made from synthetic material (cotton gets too hot).
- For those looking to make a statement, something like this.
- Sunglasses
- Something stylin'. (Please note: I cannot attest to quality of these sunglasses, but I can (almost) guarantee you'll turn some heads).
2. Optional
- Food (you might get hungry with all that hiking)
- A good book (to read while you relax at the beach)
3. For the Photographer
- Camera (duh)
- Tripod (of course)
- Something to weigh your tripod down (it can get windy)
- For instance, sand bags. What nice about the Neewer sang bag is that even if your tripod doesn't have a hook for weighing it down, you can still use this.
- A wide angle lens (30mm or less)
- In order to capture the entire beach you'll need a wide angle lens
- A Polarizer
- ND filters
- In particular, if you visit in the morning, a graduated ND filter would be particularly beneficial.
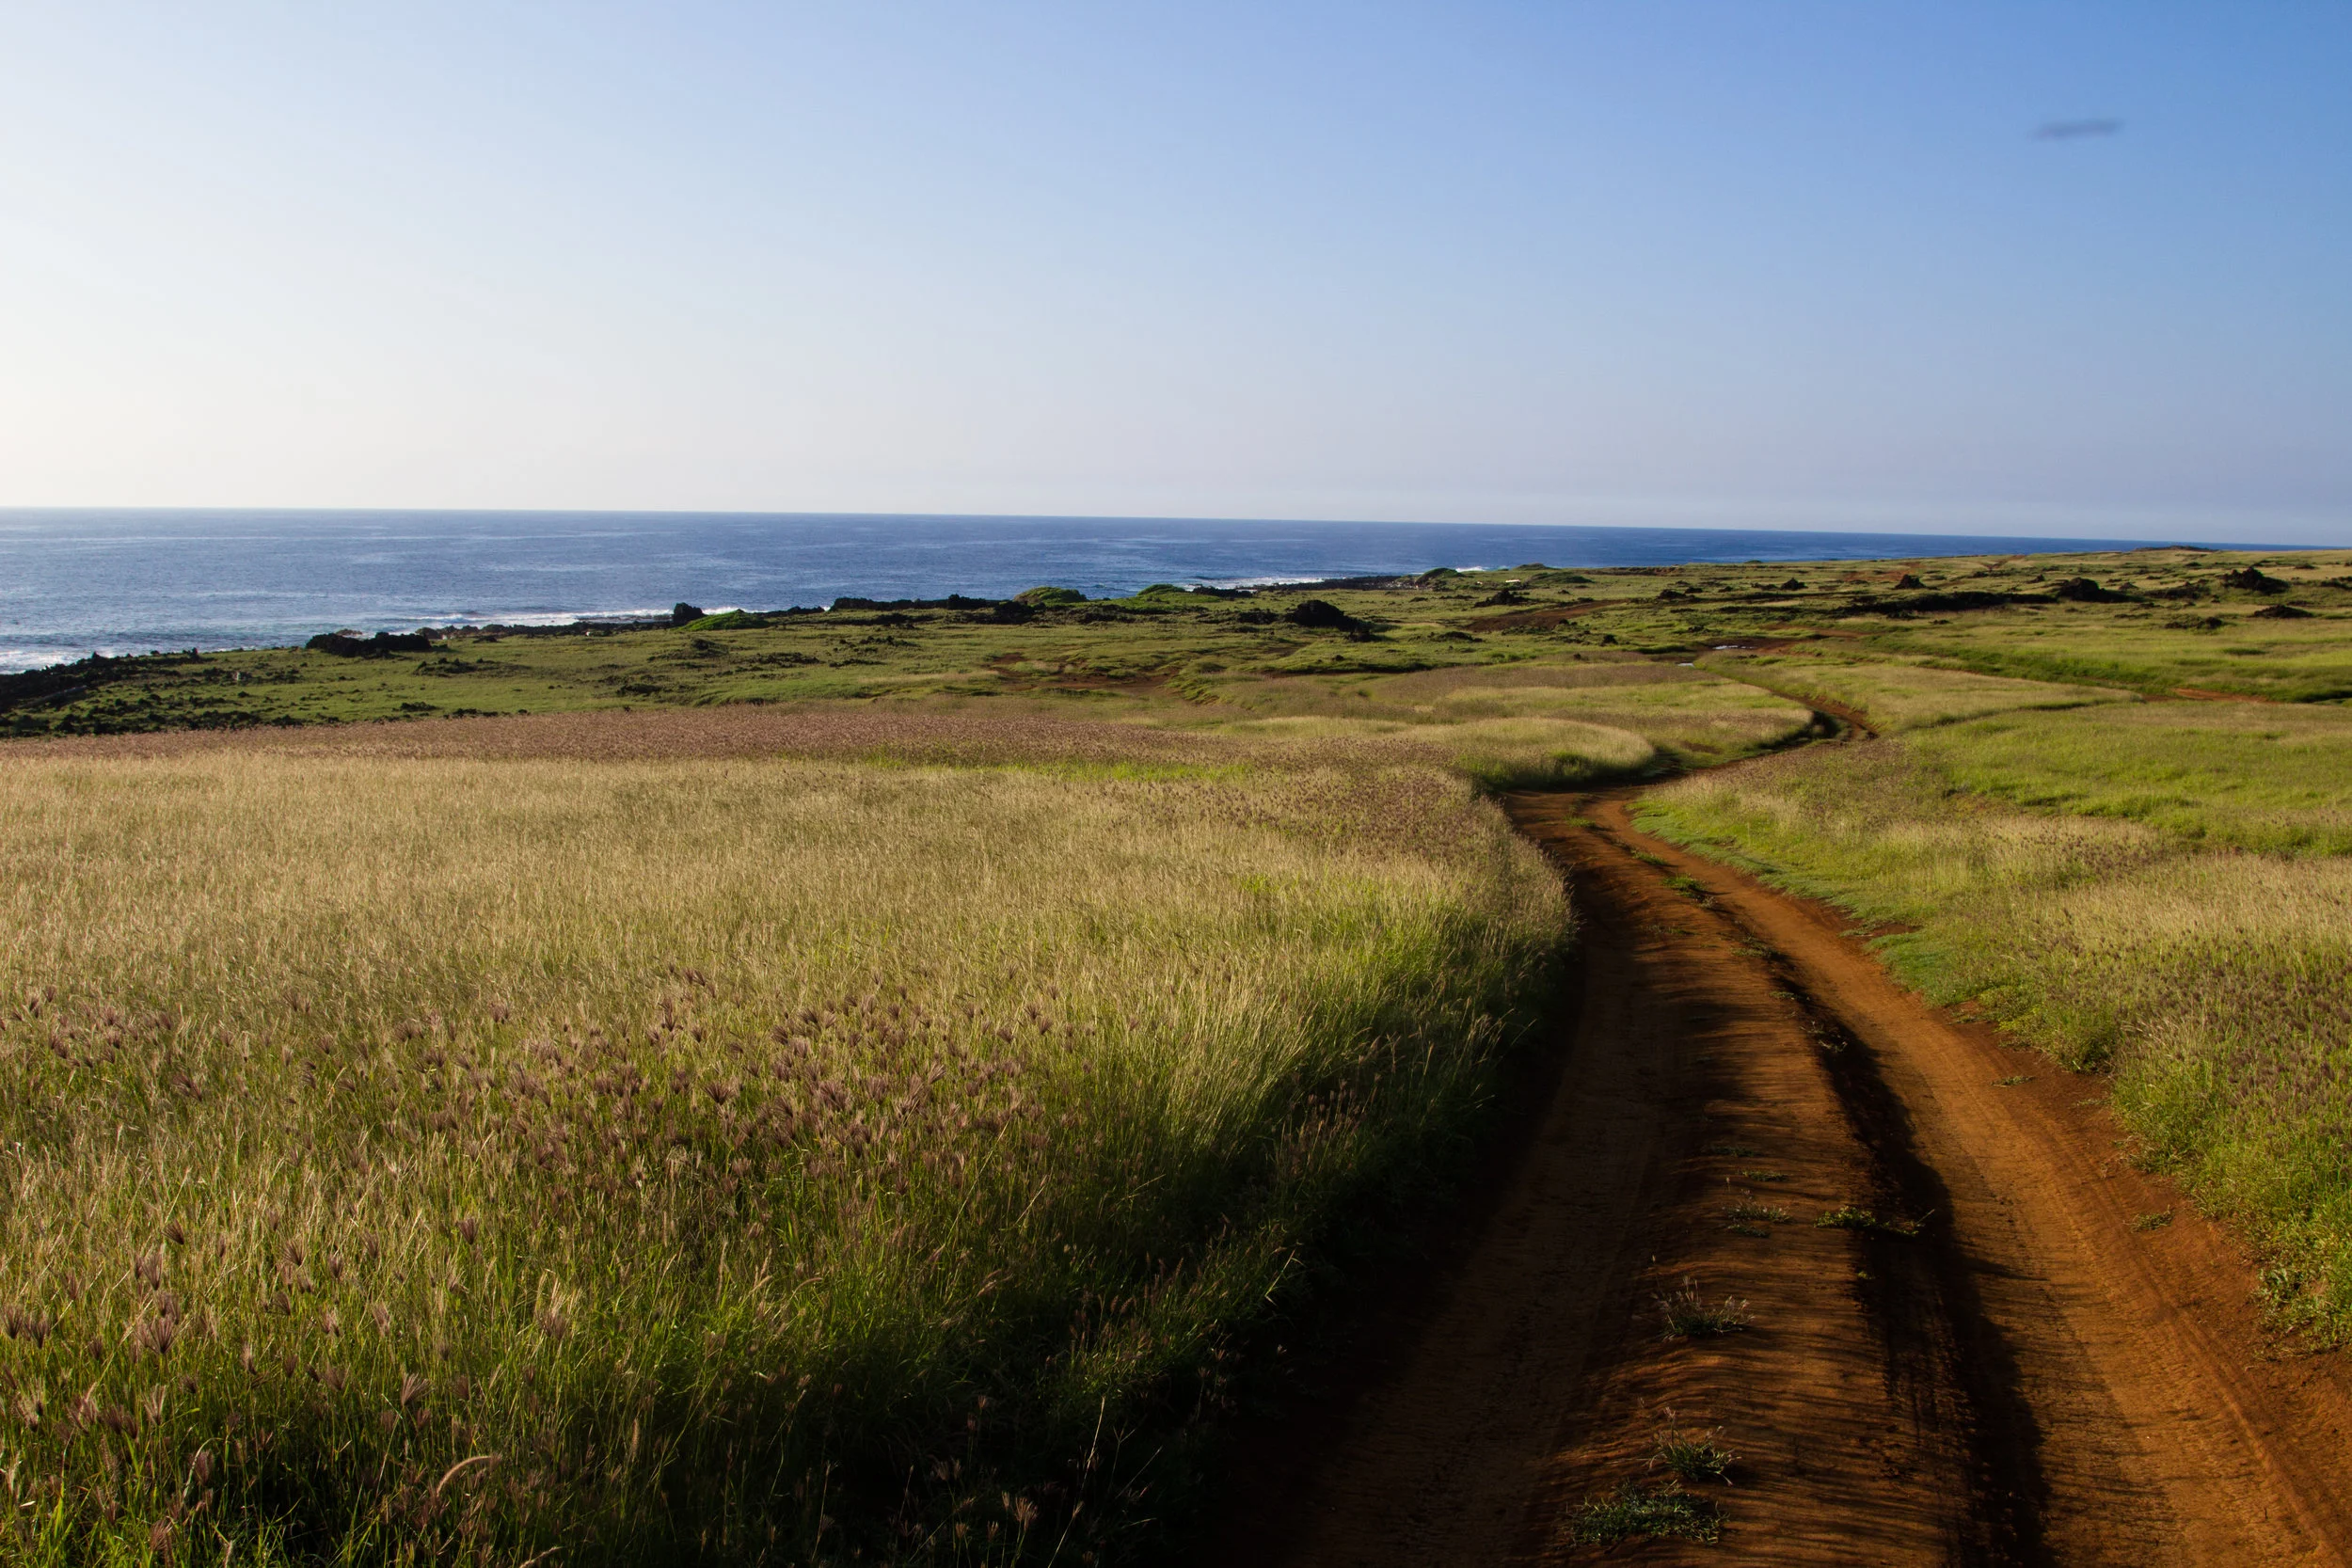
The long and winding road back to the parking lot.
Once you've got all of your gear figured out, have the hike planned, and get up early, you're all set. I hope that you find Papakolea as exciting and unique as I did; the phenomenal green sand is unforgettable. IF all that wasn't enough information for you, here is some further reading about Papakolea Beach. Aloha and enjoy your hike!